User Story
A business user has installed comm.io on his or her desktop and wants to
- Make business calls using VOIP services available through comm.io.
- Ensure these calls are tracked via the comm.io application as part of their business phone system.
Before You Start
This guide assumes the following basic setup has already been established
- comm.io has been downloaded to a local computer and is associated with a business account. If you are not sure, contact your administrator.
 You should see this comm.io icon in your applications folder and be able to launch it.
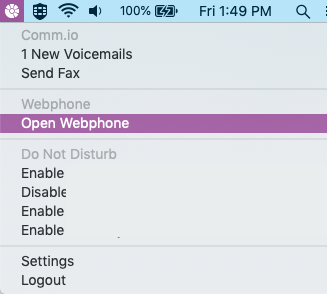
- Your account administrator should also have enabled a webphone to your user name in the User Portal account. If so, when you launch comm.io, your header should display the phone icon, as below:


Enabling the webphone
If your webphone is not yet enabled, follow this steps:
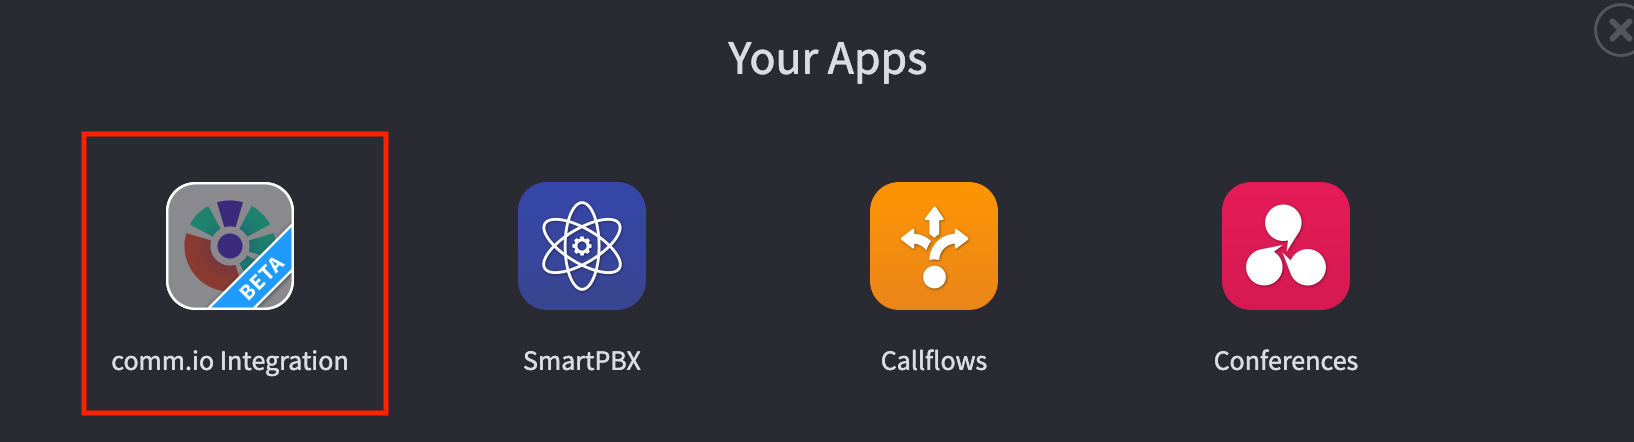
- Go to the comm.io Integration app in your Konnect Global account.

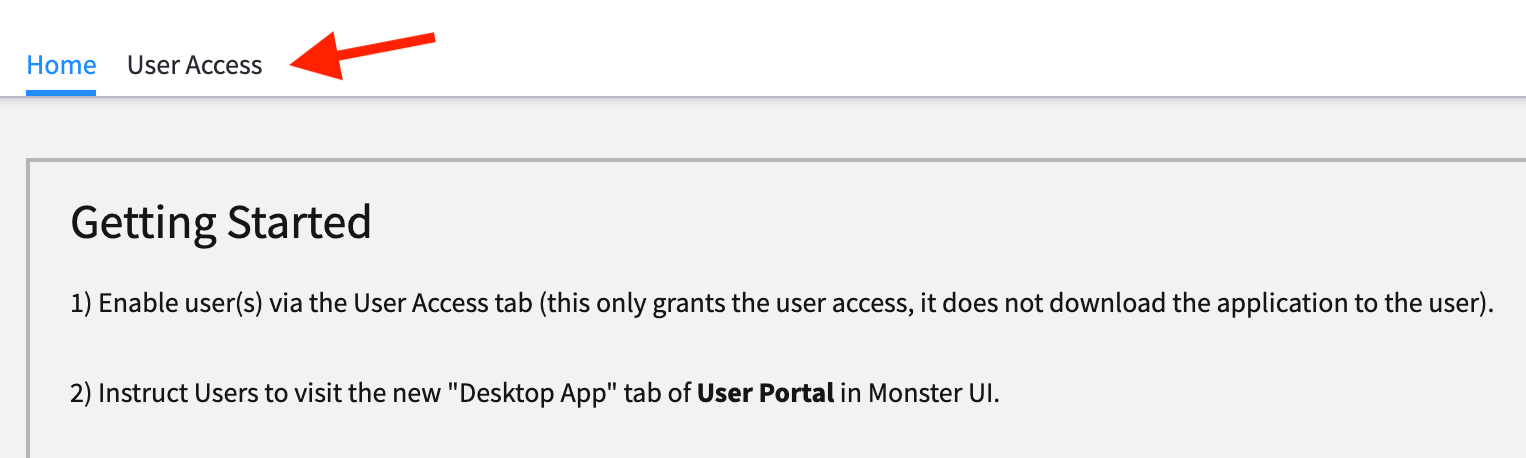
- Select the User Access tab

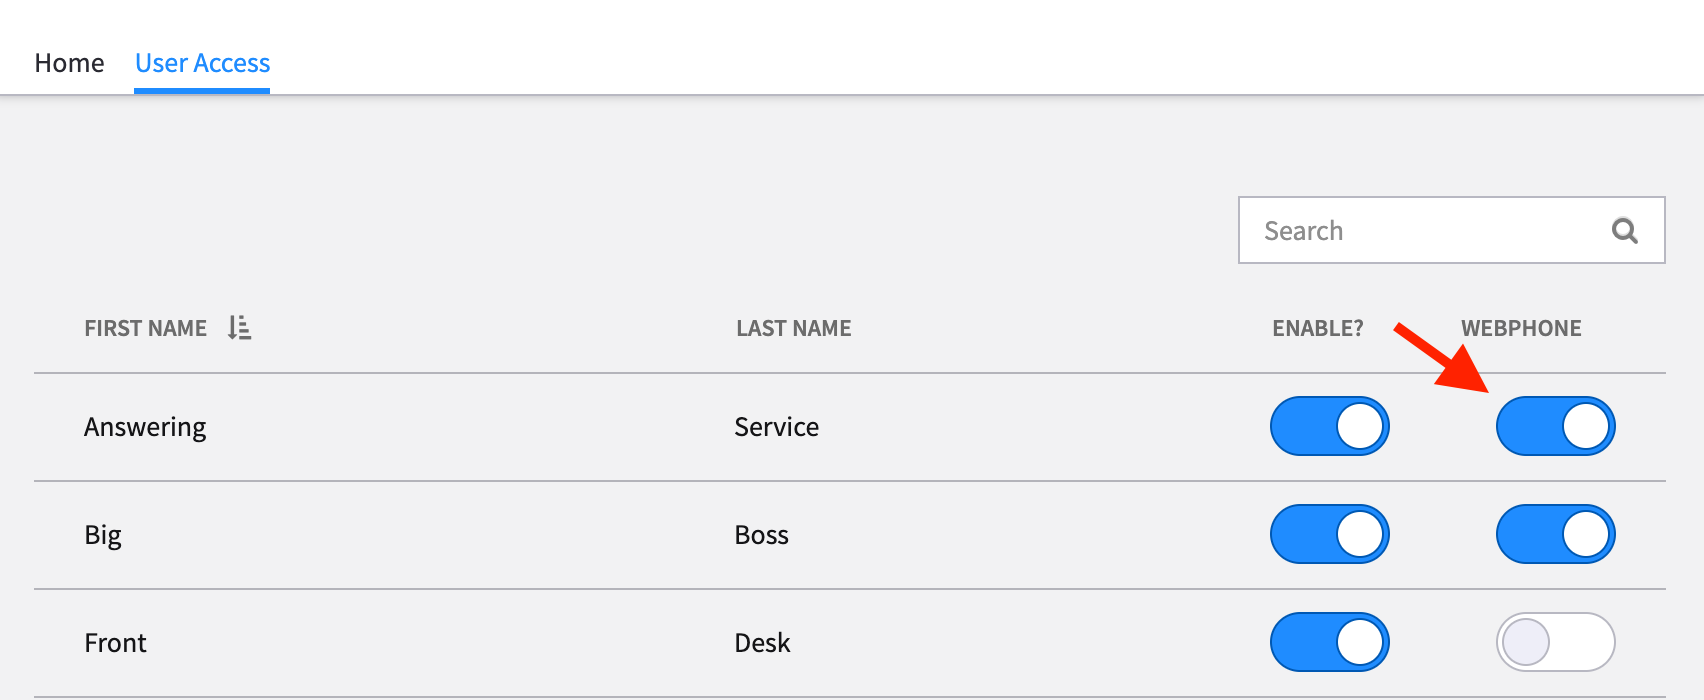
- Turn on the Webphone toggle next to your user name.
NOTE: The "Enable" toggle enables the general comm.io app, the "Webphone" toggle enables the webphone in addition to the app. This must be turned on for the webphone to work correctly.
- Once this is updated, you should automatically see the phone icon at the top right of your home screen in comm.io
- You should also see a “webphone” display under your devices & numbers tab.
Using the webphone
1. Access the webphone dialer
Once the webphone is visible and active, you can access it several ways:
- You can select the phone icon from any comm.io page OR
- If you do not have comm.io open, you can access it from the drop down tray icon at the top right of your browser (Mac Users), or the bottom right icon list (PC Users).

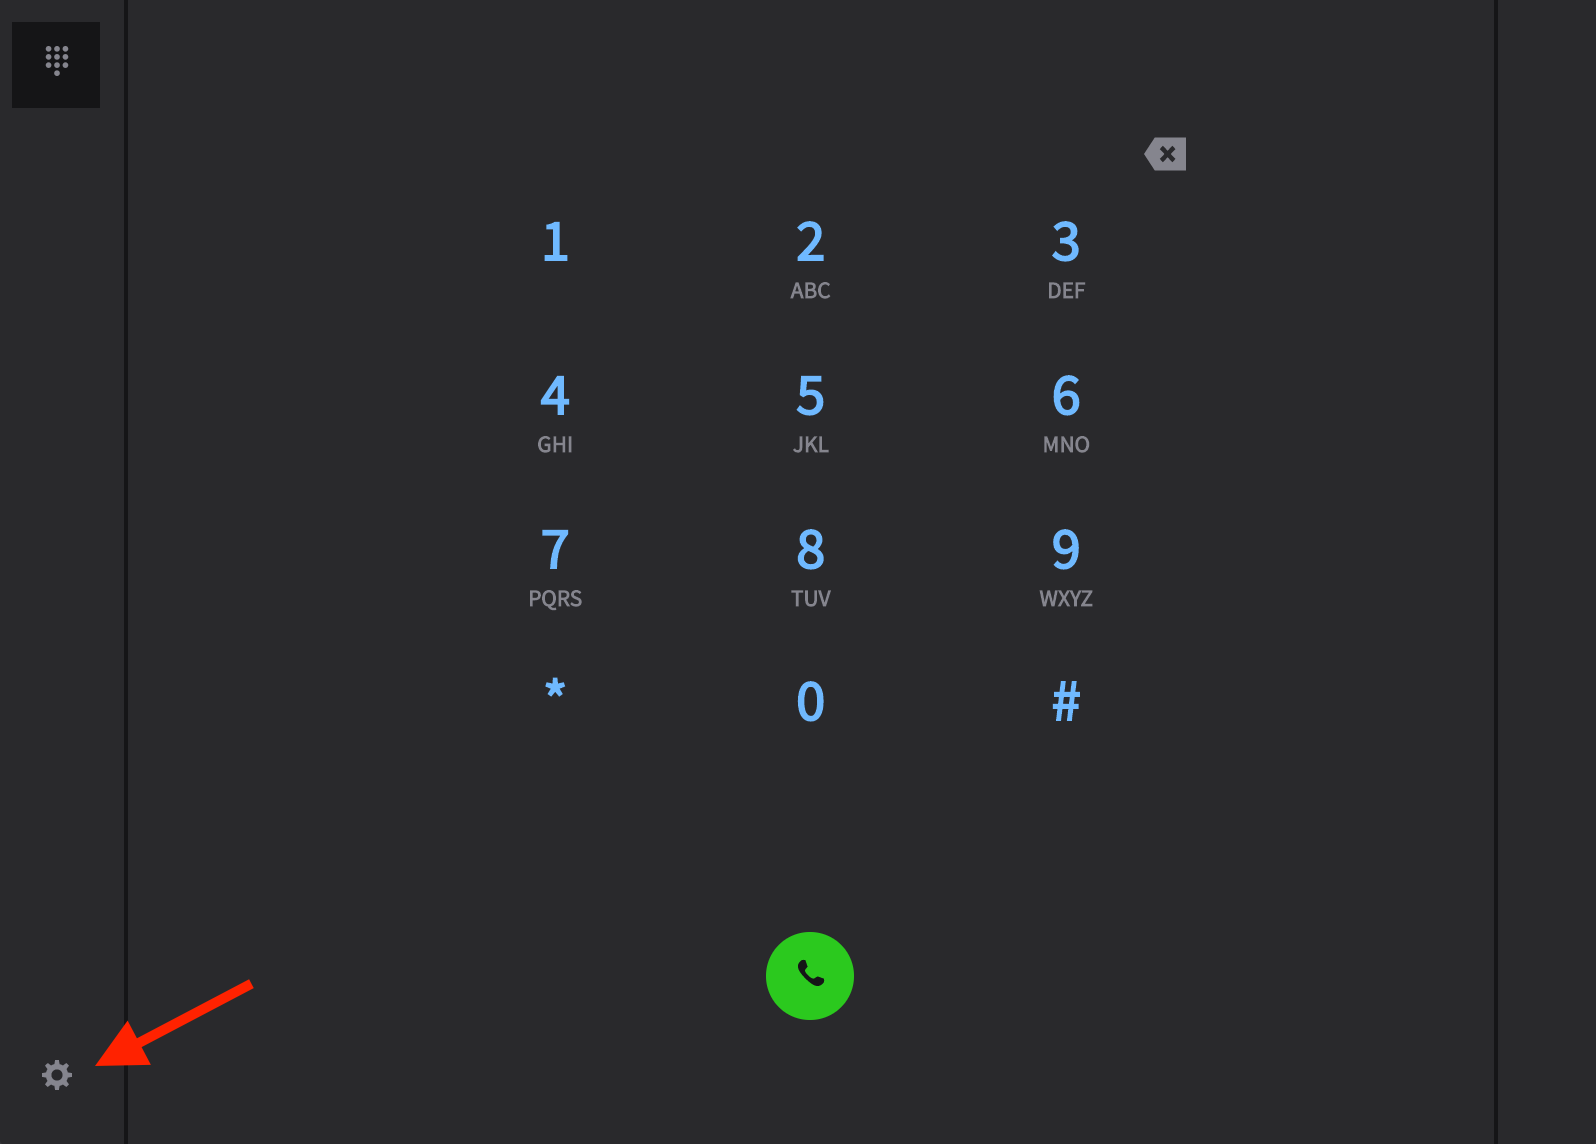
2. Open the webphone dialer
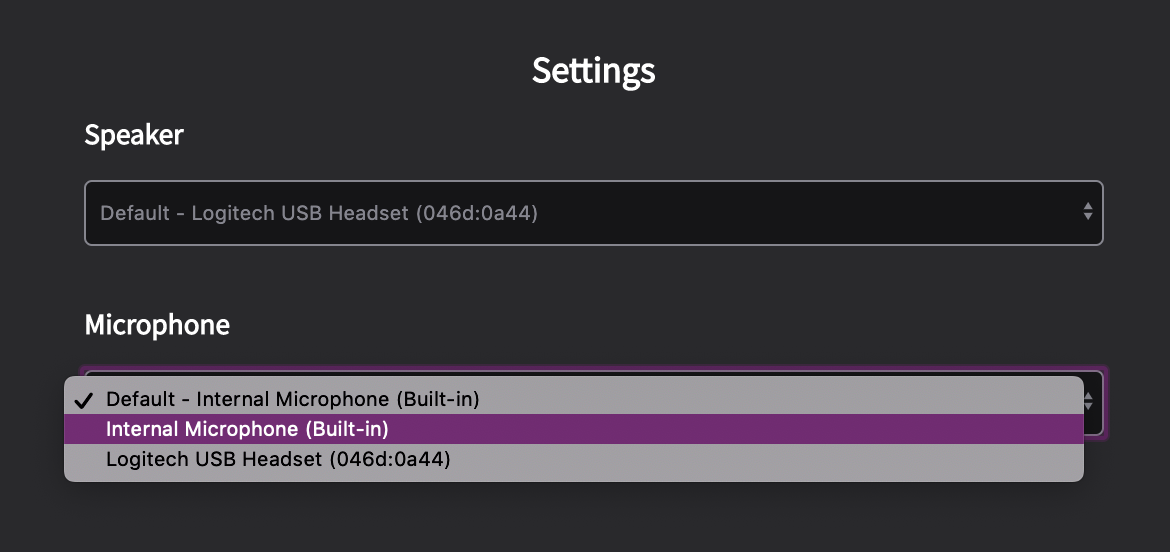
3. Review and Select your speaker and microphone settings
Click on the settings gear at the bottom left of the screen. You will be able to select any options that are enabled by your browser.
4. Dial a number and press the green Call Button.
NOTES:
- If you do not see a green call button, it is likely the webphone toggle was not assigned to your user name in the comm.io application. Please. check with your account manager to get this enabled (see steps above).
- If you have internal business extensions you can dial just the extension
- If you have another softphone installed on your desktop, it may conflict with the outgoing calls, and calls will not connect. Please disable your other phone from your user and then “disable” it in the device section. That should make the webphone work properly. We are working on how to let them co-exist.
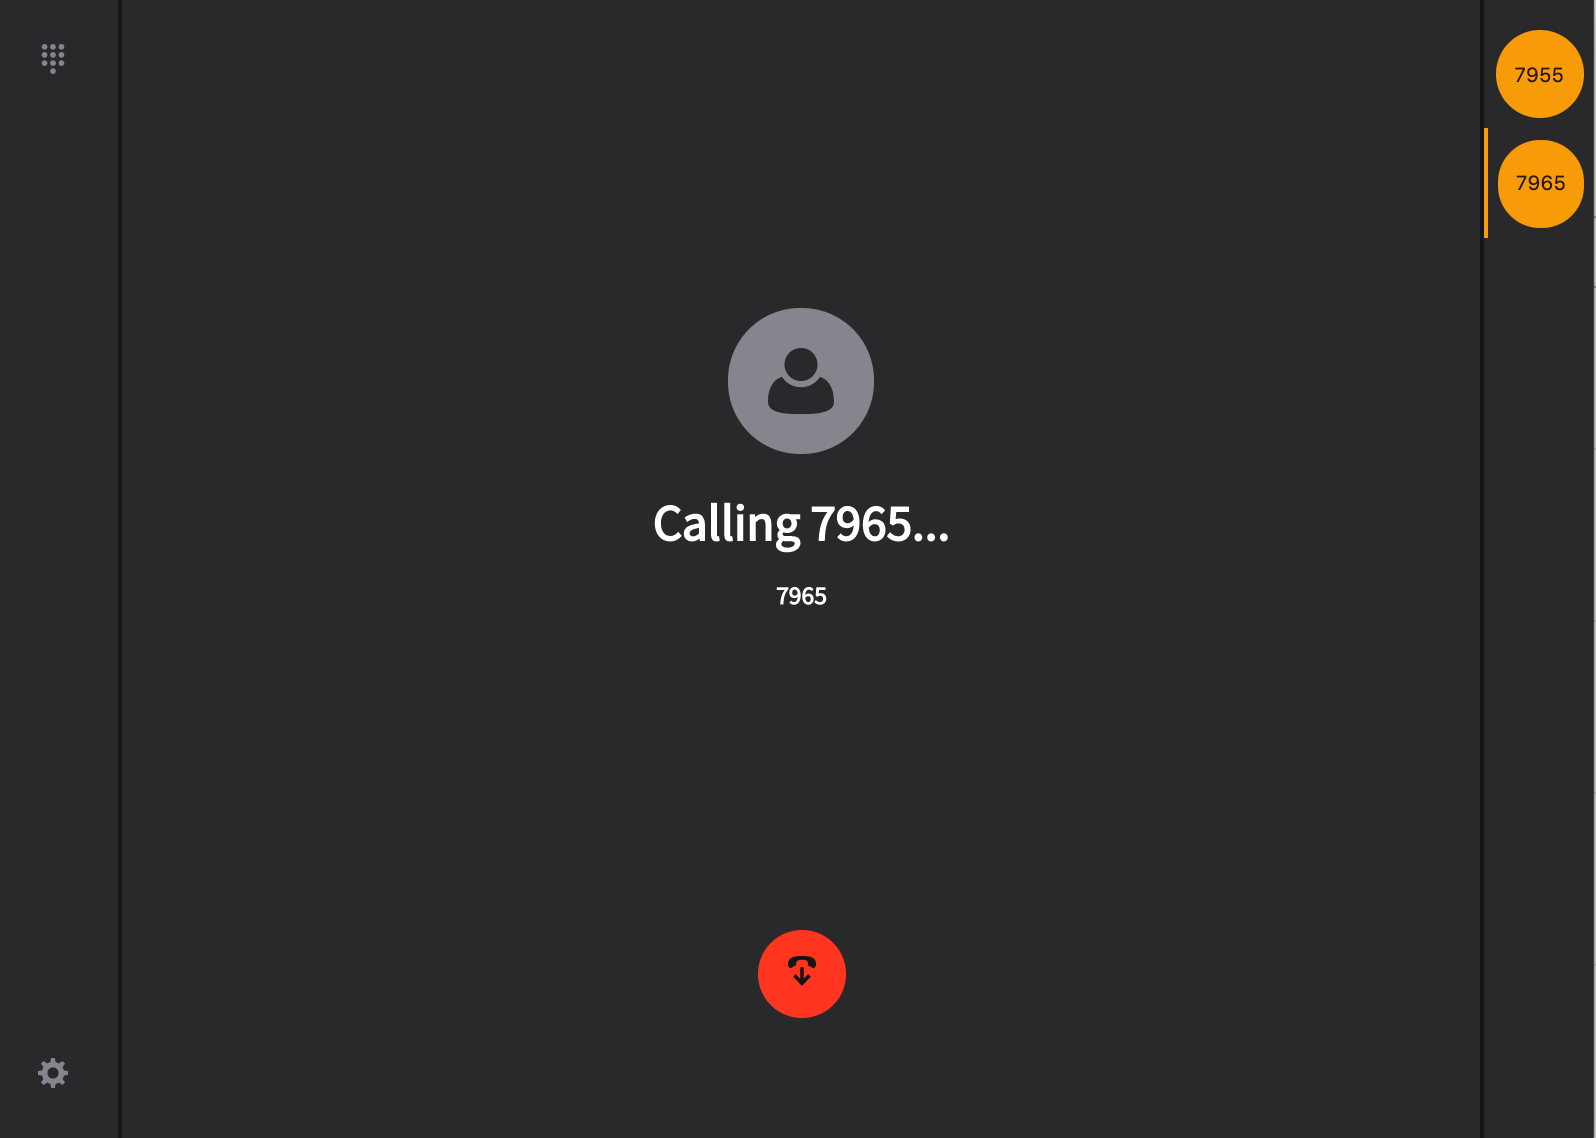
As the number dials and connects, you will see the screen below.
- The orange button at the top right is your "extension button". If you were to put this call on hold and call another extension, you can return to the original call by selecting the extension "button". The orange vertical line displays which extension is active (see right screen shot)
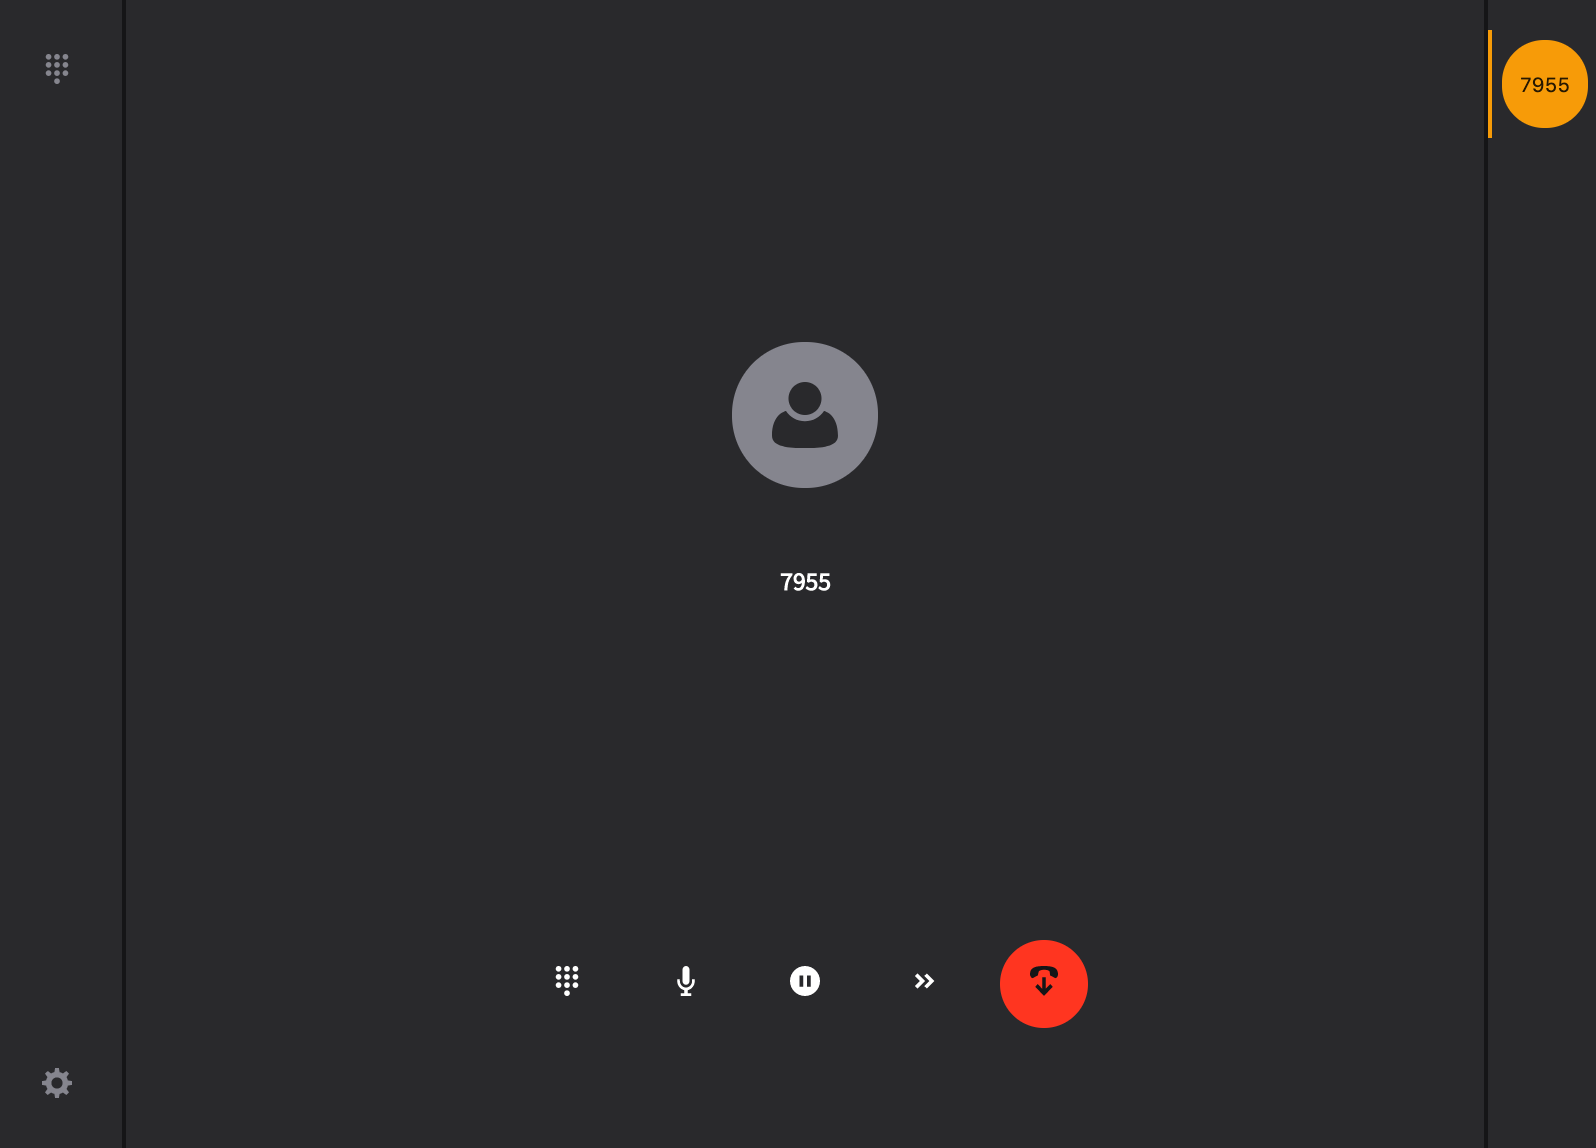
The icons below are actions available to you during your call. They are as follows:
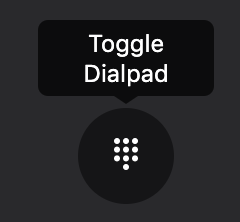
This allows you to toggle to a dialpad to enter extensions prompted by your call.
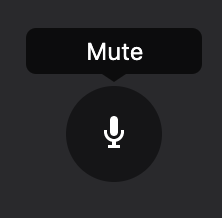
This allows you to mute / unmute your call
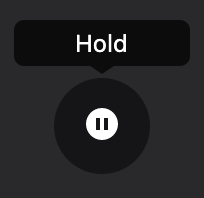
This allows you to put your call on hold, and initiate a second call
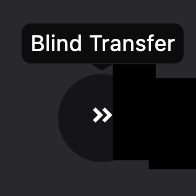 This provides a way to transfer your call to another extension

Terminate your call.
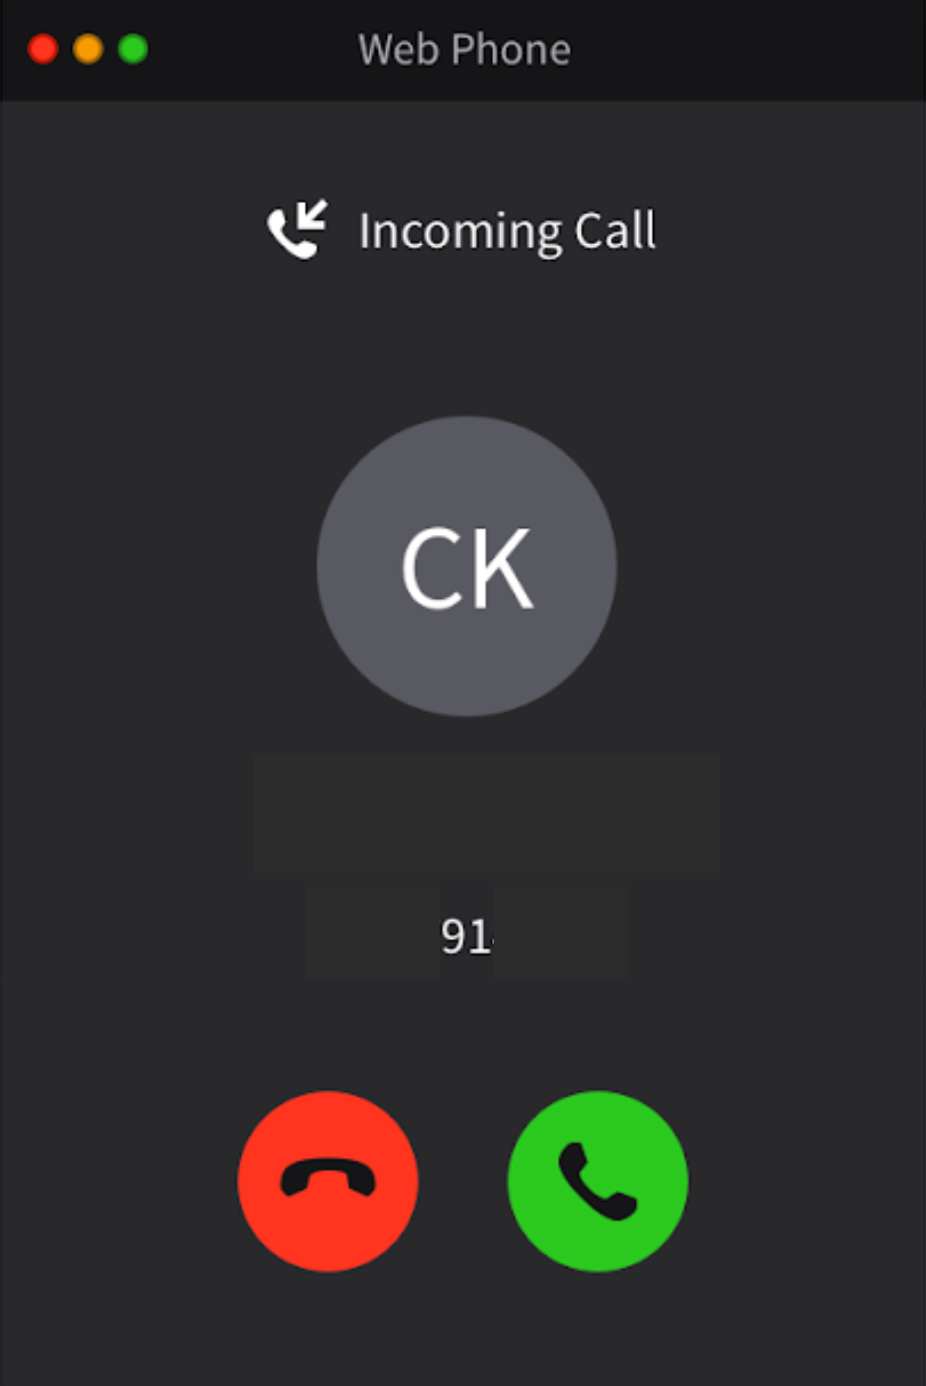
Receiving a call
If you have your comm.io app installed and you receive a call to your extension, you will see the following window display. We expect to be able to assign a ringtone shortly.
Webphone Frequently Asked Questions
How do I set up my webphone?
To add a webphone within comm.io, you must enable it within the comm.io Integration app. Ask your administrator to help you with this.
If you have already downloaded the comm.io app, in short the added steps are:
- Go to the comm.io Integration app in Monster UI as an administrator
- Select the User Access tab
- Make sure the enable toggle is ON for your user name
- Turn on the “Webphone” toggle as well. This will set up a virtual webphone to be used in comm.io
- Once this is updated, you should automatically see the phone icon at the top right of your home screen in comm.io
- You should also see a “webphone” display under your devices & numbers tab.
If you are just getting started and need to download comm.io as well,
- Ask your administrator to enable the webphone (step 4 above) at the same time they are enabling your comm.io access.
- Then refer to the step guide for downloading the comm.io app. Your phone should automatically display. You should also see a “webphone” display under your devices & numbers tab.
I do not see a green "call" button on my webphone dialpad
If you are missing the green "call" button when you initiate the dialpad within comm.io it is likely that the user you are logged in as has not been "webphone activated." To do this, you will need to have your account manager go into the comm.io application and toggle the webphone swtich that is next to your user name. See the notes above.
I dial a number and press the green button and nothing happens.
If no connection is made once you dial a number, it could be you are experiencing a conflict with another softphone installed on your desktop. If you can, remove the other phone from your user and then “disable” it in the device section. That should make the webphone work properly. We are working on a solution to circumvent this in a future release.
Once my webphone is set up do I need to also set up voicemail and call forwarding, etc. for that phone?
No, the phone will adopt the settings from your device/phone number as defined in SmartPBX.
Can I use my headset for these calls?
Yes, you can define both your speaker and microphone sources. To access these settings, click on the gear at the bottom left of your keypad screen.
How does the “blind transfer” work?
The blind transfer forwards a call to a different number without answering the call first. It maintains the initial caller ID. Select this button and enter an extension # to transfer the call to.
Where do I define / manage my caller ID information for this phone?
This is controlled in SmartPBX, navigate to your Users screen and selecting User Features for your devices.